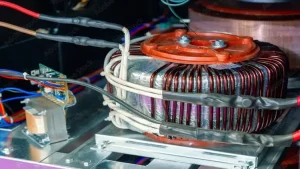
Wrong coil winding machine controller settings can quickly increase costs and cause unstable winding quality. Too many or too few winding turns wasted copper wire and cause coils to miss design requirements. Uneven coil winding may create hot spots, lower performance, and increase operating noise. Improper speed settings or tension settings can also place extra stress on gears, wire guides, and motors, leading to faster wear. Accurate controller setup helps every coil meet quality standards while reducing material waste and machine maintenance costs.
Essential Parameters in Controller Setting

When configuring a coil winding machine, several key controller settings directly affect winding quality and production efficiency. Understanding these settings step by step helps achieve more stable, accurate, and efficient winding results.
Number of Turns & Layers
This basic coil winding machine setting tells the controller exactly how many turns to wind and how many Wire Diameter & Insulation Thickness.
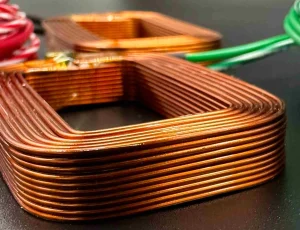
Every coil winding machine controller setup should also consider the wire gauge and insulation type. Thicker wires take up more space on the bobbin, so ignoring this detail can easily lead to uneven layers, overlaps, or incorrect turns. Proper adjustment helps ensure smooth winding and consistent coil quality.
Bobbin / Coil Form Dimensions
The width and height of the bobbin or core form define how the wire guide moves during coil winding machine setup. Entering these dimensions correctly in the controller settings helps ensure the wire stays neatly within the edges, avoiding spills, gaps, or uneven winding across the core.
Winding Direction
Selecting clockwise (CW) or counterclockwise (CCW) in coil winding machine controller settings determines the coil’s winding direction and overall orientation. This step is especially important for polarity-sensitive designs, ensuring correct electrical performance and reliable coil assembly.
Traverse / Wire Guide Motion
The traverse in a coil winding machine controller manages how the wire moves across the coil width during winding. With precise motion settings, the wire is laid evenly, helping create compact coils, consistent spacing, and stable inductance performance.
Speed Settings
A coil winding machine controller allows multiple speed ranges:
High speed for improved production efficiency.
Low speed for delicate winding work or precise start and finish turns.
Ramp-up / Ramp-down speeds to ensure smooth acceleration and deceleration, preventing sudden tension spikes and reducing the risk of wire breakage.
Mode Selection & Special Functions

Modern coil winding machine controllers go beyond basic turns and speed control. They also include advanced operating modes and special functions that help fine-tune the winding process, improve accuracy, and ensure more stable production performance.
- Auto-Start vs Manual / Pedal ModesIn a coil winding machine controller, Auto-Start delivers hands-free, efficient continuous production. Pedal mode offers manual control for flexible, precise work. Choose based on your priority: speed or winding accuracy.
- Pause at Ends & Slow Traverse
For your coil winding machine, these settings slow or pause the wire at coil edges. This prevents buildup, keeps layers neat, and ensures consistent winding quality. - Stop at Edges
This coil winding machine controller feature stops winding precisely at the edges, keeping coil length uniform and layers neatly aligned. - Edge Braking & Speed Braking During Stop
During machine stopping in a coil winding machine controller, these braking functions help lower wire tension spikes, protecting both the wire and coil form while ensuring a smooth and controlled stop. - Home Position / Reset Settings
This coil winding machine controller feature ensures the machine starts from a fixed reference point, cutting setup time and making repeat jobs faster and more consistent.
Programming the Controller

When configuring a coil winding machine controller, the key is entering correct parameters in order, with no steps skipped. This guides the machine to wind wire exactly as needed, for accurate, consistent coil production.
- Input Sequence
- Display Windows & Status Indicators
On the controller, display windows show key information such as specifications, program steps, timing, and turn counts. Flashing numbers indicate values are ready for editing, while stable numbers confirm they have been saved. The status indicators (Ready/Waiting lights) show whether the system is idle, prepared for a job, or actively running, allowing quick and clear monitoring during operation. - Saving & Recalling Recipes / Programs
To save time on repeat production, use the recipe storage function in the controller. Each saved program stores key settings such as turns, pitch, and speed. Clear labeling helps operators quickly recall the right recipe, reducing setup errors and improving overall setup efficiency.
Testing & Validation

Even with accurate controller settings, every coil winding job needs a quick check. This avoids errors, saves time, reduces waste, and ensures reliable results.
- Dry Run / Trial Winding
Before full production, run a dry test or low-speed trial winding. This checks the traverse movement and wire guide system, ensuring smooth alignment and stable control before full production. - Visual Inspection
After the first few layers, pause the winding process and inspect the coil. Check whether the turns are even, tight, and free of gaps or overlaps. This quick early inspection helps catch issues in time and avoids the need for costly rewinding later. - Measure Actual Turns vs Controller Reading
Finally, verify the controller turn count matches the actual coil turns. Any mismatch points to sensor or setting issues; correct them before mass production for reliable results.

Once the basics of controller setup are mastered, more advanced settings can be used to improve precision and efficiency. These options help fine-tune machine performance and adapt to different coil designs for more stable and accurate winding results.
Counter Resolution
Select integer or decimal turn units in the controller settings. Decimal mode improves high-precision coil winding, where even fractional turns affect accuracy and consistency
Traverse Start, End, and Locking
Set traverse start/end positions in the controller to control wire movement. Locking or reversing improves layer alignment and winding consistency.
Stopping Logic
Automatic Brake Engagement
Turn automatic braking on or off in the controller settings when winding stops. It prevents wire slippage, protects the wire, and keeps tension stable.
Troubleshooting Common Controller Errors

Even well-optimized controller setups can sometimes run into issues. Being able to quickly identify and fix correct controller errors helps keep production stable, reduces downtime, and ensures smooth and efficient operation.
- Mismatched Turn Count
If actual turns don’t match the controller reading, check sensor alignment and counter settings to restore accurate counting. - Wrong Direction
When coils appear reversed, check that the winding direction (CW or CCW) matches the controller program to correct the setup. - Speed or Tension Mismatch
If layers look uneven, the actual speed may not match the set value. Adjust ramp-up/ramp-down settings and ensure tension control stays consistent for stable winding. - Parameter Overflow
Travel limit exceeded” errors usually mean incorrect traverse range or coil size settings. Reset the dimensions and reprogram the controller to correct the issue.
Best Practices & Maintenance of Settings

Document Settings for Each Coil Design
Each coil design has its own optimal parameter settings, including turns, layers, pitch, and speed. Record these in a job card or digital log so settings can be reused easily. This helps speed up setup, reduce trial-and-error, and maintain consistent winding quality.
Regular Calibration of Sensors or Encoders
Periodic Review of Firmware & Software Updates
Ready to Optimize Your Coil Winding?

Your production needs precision, and the right controller settings are key to consistent results. Whether it’s machine setup, troubleshooting, or optimizing winding parameters, our team is ready to support you and help improve overall performance.
Contact us today for expert support, detailed operation files, or more information about our coil winding solutions. Our team is ready to help make your winding process smoother, faster, and more reliable.