When it comes to coil winding, wire tension is everything. Getting the right balance ensures your coils are tight, uniform, and reliable. If the tension is off, even by a little, the quality of the winding can suffer.
Too loose, and the wire may slip or overlap unevenly, leaving you with coils that lack compactness and strength. Too tight, and the wire risks snapping under stress, causing breaks in production and wasted material. Both situations not only slow down your workflow but also shorten the lifespan of the finished coil.
That’s why maintaining proper wire tension isn’t just a technical detail—it’s the foundation of consistent winding performance. In this guide, we’ll walk through the problems caused by incorrect tension, explain how to adjust it effectively, and share practical tips to keep your machine running smoothly.
Common Tension Problems in Slider Head Machines
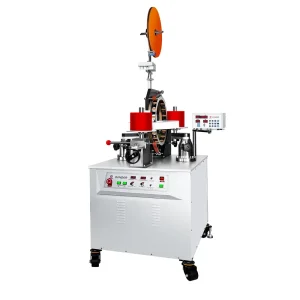
Getting wire tension right is one of the biggest challenges in coil winding, especially with slider head machines. Two common problems usually show up:
Too Loose
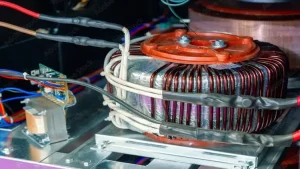
When the tension is too low, the wire flows too freely. This causes coils to spread unevenly, leaving gaps and reducing compactness. The result is a coil that looks irregular and lacks the strength needed for consistent performance. Loose winding also increases the risk of vibration during operation, which may shorten the coil’s service life.
Too Tight
On the other hand, if the tension is too high, the wire faces too much stress. This can lead to sudden wire breaks that stop the winding process altogether. Not only does this waste material, but it also interrupts production and can damage the machine or the coil core. Over-tight winding also puts unnecessary strain on the insulation, making the coil less reliable over time.
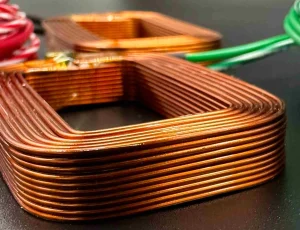
Keeping the balance between these two extremes is critical. Proper tension ensures every coil is tight, uniform, and durable—while protecting the wire from damage.
Step-by-Step Solutions
Getting the right wire tension isn’t guesswork—it’s a process. By adjusting both the clamp plates and the wire feeder correctly, you can achieve smooth, uniform winding every time.
Clamp Plate Pressure Adjustment
The wire always passes between two clamp plates, which act like a gate controlling flow. If the pressure is wrong, the wire either slips too freely or gets pinched too hard.
Use the four screws on clamp plate 2 to fine-tune the pressure.
After each adjustment, pull the wire through by hand to feel the resistance.
Repeat the process several times until the tension feels balanced—firm enough to guide the wire, but not so tight that it drags.
Think of it as tuning a musical instrument: small adjustments make all the difference.
Wire Feeder Tension Adjustment
The wire feeder works as the second stage of tension control. Set it correctly, and the wire flows steadily through the winding path.
First, loosen the white plastic sleeve on the feeder.
Move the feeder’s end connection:
Up to increase tension
Down to reduce tension
Important: Never adjust at the sharp ends or the middle of the feeder rod. This won’t create the right tension and may even damage the part.
By carefully combining clamp plate pressure and feeder tension, you’ll have full control over how the wire lays on the core—tight, uniform, and ready for high-quality coils.
Best Practices for Setup
Getting wire tension right isn’t just about adjusting parts—it’s about building repeatable habits that keep every coil consistent.
Match settings to wire size
Always adjust clamp pressure and feeder tension based on the actual wire diameter. Thin wires need lighter tension, while thicker wires can handle more.Test before you run
Before starting full winding, pull the wire manually through the setup. It should feel firm but smooth—neither slipping nor dragging. A quick test saves time and prevents scrap.Document your sweet spot
Once you’ve found the best screw positions for a particular wire, record them. Keeping notes for each job means faster setups and more reliable results on repeat orders.
By following these steps, you’ll ensure stable winding, longer machine life, and fewer interruptions during production.
Mistakes to Avoid
Even experienced operators can make small errors that cause big problems in coil quality. Here are the most common mistakes to watch for:
Over-tightening clamp plates
Too much pressure blocks wire flow, making the winding uneven and risking breaks.Too little pressure
If the plates are too loose, the wire runs out too quickly and the coils lose compactness.Wrong feeder adjustment points
Adjusting the feeder rod at the sharp tip or mid-section doesn’t work. Always move it at the correct end connection.
Pro Tips
A few extra habits will save you downtime and improve results:
Keep everything clean
Wipe clamp plates often so residue doesn’t affect wire tension.Schedule preventive checks
Inspect feeder springs, screws, and moving parts regularly to keep tension control stable.Trial runs save trouble
Use scrap wire to test adjustments before switching to production batches. It’s the quickest way to confirm your setup.
By avoiding these mistakes and following these tips, you’ll keep slider head winding machines running smoothly—and produce coils that pass inspection the first time.
Ready to Improve Your Coil Winding Results?
Struggling with tension issues or looking to optimize your coil winding setup? Our team at Guangri Winding Machinery is here to help. From precision machines to expert guidance, we provide solutions that keep your production smooth and efficient.
Contact us today to get tailored support, request technical files, or learn more about our latest winding machines.