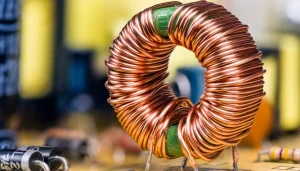
А toroidal taping/winding machine builds and finishes кольцевые катушки. Он загружает проволоку или изолирующую ленту в челнок (или магазин), вращает тороидальный сердечник, и кладет каждый ход с контролируемым высота тона, скорость и напряжениеВы увидите эти машины в трансформаторных цехах, силовых агрегатах электромобилей, аудиоблоках, медицинских приборах и в любом месте, где низкая утечка, низкий уровень шума изготовлены тороидальные детали.
In addition, when equipped with a taping head, the machine wraps бумага/полиэстер/каптон tapes evenly around the core. This improves insulation and mechanical strength while ensuring a clean, uniform, and repeatable taping process.
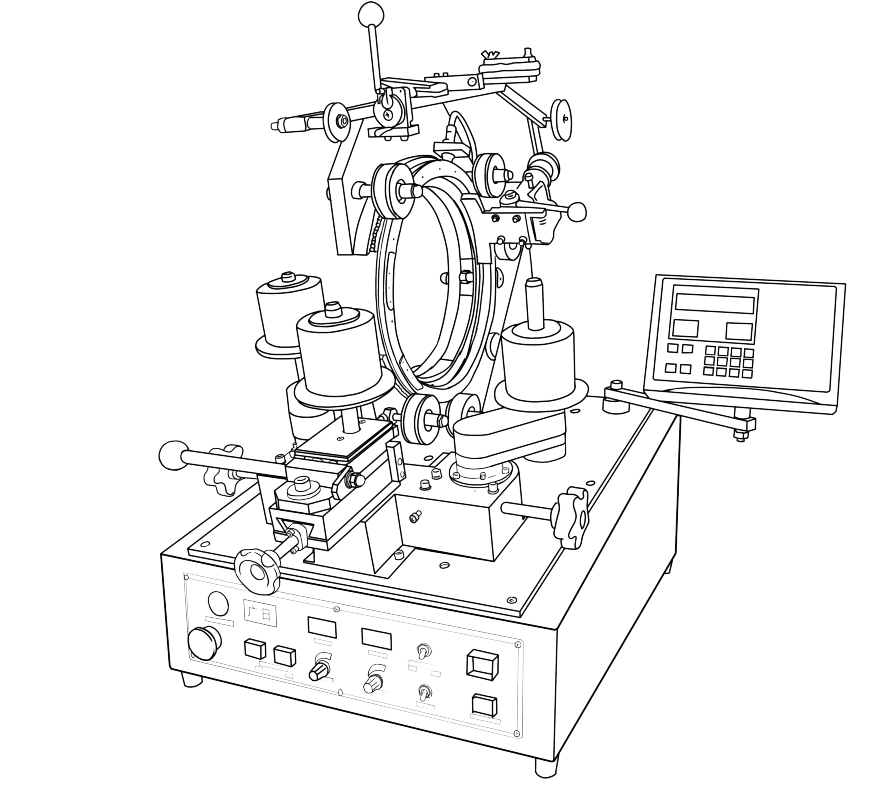
This guide covers Guangri’s PLC-controlled models, включая JGC series. With a durable design and a smart PLC controller, operators can save recipes, switch between auto и pedal modes, and achieve consistent production across every shift.
Power & Safety Setup
Before starting any обмотка или taping operation, always put безопасность first. First, install the machine in a clean, well-ventilated area with a temperature of 13–35°C, low vibration, and no corrosive fumes. In addition, ensure proper grounding and use the correct circuit breaker for the источник питания. These simple checks help prevent electrical hazards and protect both the operator and the equipment.
How to Power On Your Машина для намотки катушек:
Отпустите Аварийная остановка (E-stop).
Переверните выключатель питания на базе.
The controller will boot into Состояние ожидания. The Индикатор «Готов/Ожидание» lights up when it’s ready. If it’s off, the machine is in Установка состояния, meaning parameters can still be adjusted.
Pro tip: Before loading a core, always double-check the grounding connection and confirm the E-stop reset is properly released. This helps avoid startup faults and ensures a smooth machine start-up process.
Front Panel Controls

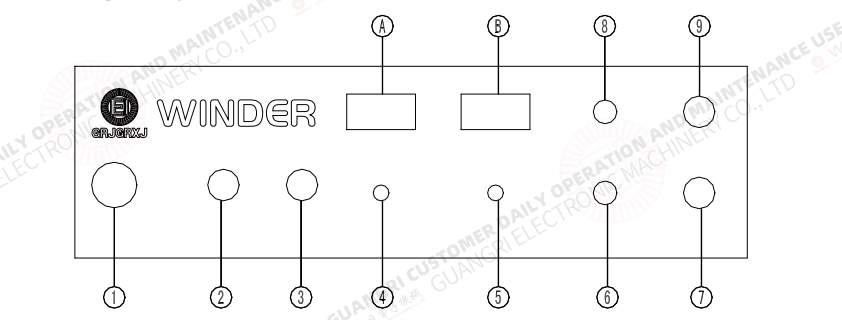
The Guangri controller front panel is the main control center of the tape machine, handling all key operations:
Девять функциональных клавиш on the tape machine handle power, start/stop, reset, manual jog, direction control, and auto/manual mode selection.
Two adjustment knobscontrol speed (winding/taping RPM) and pitch (spacing between turns or tape wraps).
The direction switch controls rotation direction, setting CW (по часовой стрелке) или CCW (против часовой стрелки).
The mode switch toggles between Ручной режим (slow jog and setup adjustments) and Автоматический режим (непрерывная намотка/обмотка лентой).
Operation Flow of the Машина для намотки ленты
Клавиша «Пуск/Стоп»: arms the system and starts the cycle
Сброс ключа: clears errors or gets ready for the next job
Ручной режим: used for setup, coil positioning, or trial runs
Автоматический режим: enables repeatable, hands-free winding/taping with stored programs.
You can also run via foot pedal mode or switch to full Auto-start (machine ramps up and down automatically).
Rear Panel Switches
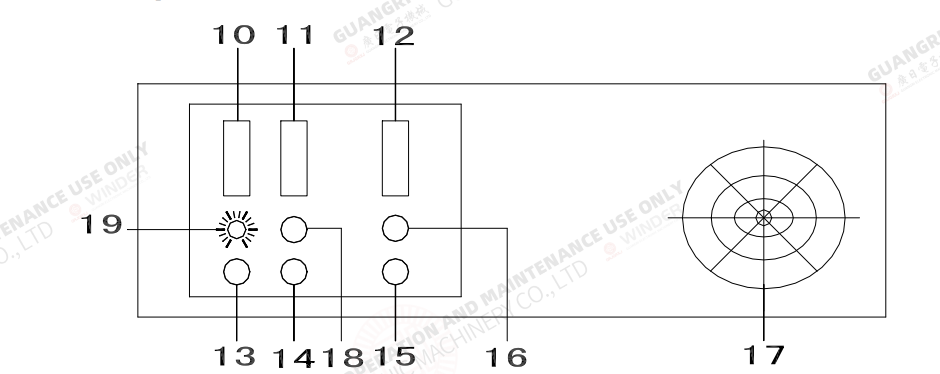
The base and rear control panels house all connections and deeper configuration settings:
Базовые розетки connect the controller, foot pedal, sensors, and—on taping machines—the auto-scissors, also including fuse access and main power input.
The mode selector switch lets you choose Режим педали (pedal controls speed/stop) or Автозапуск (automatic acceleration/deceleration by controller).
The grounding terminal must always be securely connected before operation.
На controller rear panel, you’ll find several machine configuration switches:
Тип машины выключатель: selects toroidal, belt/slider, gear head, or taping models.
Переключатель вращения: sets single or double-direction rotation when reversals are required.
Переключатель преобразователя: matches the correct sensor type(e.g., JG = 7PA, JGC = 7NA). an incorrect setting will prevent the counter from working.
Переключатель направления пуска сердечника:sets the starting direction for fan-shaped windings in Автоматический режим.
Important: Set all rear-panel switches before the first power-up to ensure the controller recognizes the correct machine configuration.
Controller Programming Overview

Ae t thheart of Guangri’s toroidal taping and winding machines is the панель контроллера, где операторы настраивают и управляют каждой задачей. Панель использует четыре ключевых окна отображения:
Окно спецификации – stores job numbers and allows quick saving or recalling of coil specifications.
Окно программы – sets the working sequence, such as Load → Wind, with support for additional tap steps.
Временное окно – defines how many times each step repeats, reducing the need for repeated programming.
Поворачивает окно – sets precise turns for loading, winding, slowdown, and reversal in fan-shaped windings.
The machine operates through three control states:
Установка состояния – where parameters are entered and adjusted.
Состояние готовности – once settings are confirmed, the machine is ready to run.
Состояние обзора – meanwhile, stored parameters can be checked before pressing Начинать.
In addition, the Setting, Enter, Return, and Review keys guide operators through parameter input and confirmation, ensuring a smooth, consistent, and reliable workflow.
Auto & Pedal Control Modes
Кроме того, Guangri machine offers flexible control, allowing smooth switching between pedal operation и Режим автоматического запуска.
Режим педали: The operator controls speed and start/stop using the foot pedal—ideal for setup and manual machine control.
Режим автоматического запуска:Set via the rear switch on the base, the machine automatically ramps up to preset speed and smoothly slows down at the end without pedal input.
Notably, the пропорциональное связывание between the main drive и rotation drive is a key feature of the Guangri machine. It keeps шаг провода accurate at any скорость намотки, гарантируя consistent spacing и tighter control across different катушки.
Head-Type Setup & Winding
Другой winding heads need slightly different handling; the Guangri machine supports multiple head designs:
Головка слайдера – First load the core, then adjust the фрикционная пружина и нажимная подушка to set proper натяжение проволоки; ensure the slider moves smoothly without blocking the wire.
Головка ремня – Secure the wire end, then fine-tune grip using the винт натяжения ремня. Keep the free wire end stable under the core before winding.
Головка редуктора – Set the тормоз to the correct tension before loading. Align the magazine и slider properly, and make sure the wire passes through the направляющая канавка without slipping.
Головка для тейпирования – Route the tape through the pressure clip и electric scissors before feeding it into the magazine. Once running, the machine applies tape automatically and the scissors cut it at the end.
Overall, each head type has its own setup details, but all share the same goal: maintaining stable tension control and ensuring precise winding or taping accuracy
Taping Calculations & Setup
Additionally, understanding a few basic taping calculations helps achieve accurate and repeatable results. The key formulas are:
Повороты ленты = окружность сердечника ÷ (ширина ленты – перекрытие)
Повороты нагрузки = обороты ленты × (длина одного оборота ÷ окружность магазина)
These calculations ensure proper tape overlap, helping maintain consistent толщина изоляции and full coverage on every layer.
Пример настройки:
Измерьте core outer diameter to determine the circumference
Select the tape width and desired overlap (e.g., 2 mm).
Calculate the required tape-turns using the formula.
Enter the load-turns value into the controller.
Запустить dry test cycle to verify settings before production.
By following these steps, you can reduce trial-and-error while maintaining consistent taping quality and material efficiency.
Essential Switch Setup
Most importantly, before the first power-up, make sure all front and rear panel switches are set correctly. Missing this step may lead to counting errors, incorrect settings, or machine startup issues.
Режим: select Auto или Педаль operation based on your workflow.
Тип машины: choose the correct обмотка, taping, or head configuration.
Вращение: set CW (по часовой стрелке) или CCW (против часовой стрелки) направление.
Тип датчика: match 7PA или 7NA to the machine model, as an incorrect setting will prevent the counter from registering.
As a result, these basic settings help the controller recognize the correct hardware configuration and ensure accurate winding or taping operation according to the programmed settings.
Operating Workflow
Каждый winding or taping job follows a clear and structured process to ensure accurate and consistent results:
Настройка загрузки: Open the shuttle или magazine and secure the core in place.
Регулировка роликов: Set the polyurethane rollers for proper grip and smooth operation.
Протягивание нити: Route the wire or tape through the guides, pads, and tensioners correctly.
Начать процесс: Нажимать Начинать to begin. In Автоматический режим, the machine reaches the preset speed automatically; in Режим педали, speed and movement are controlled manually.
Монитор: Adjust the скорость и pitch knobs as needed to fine-tune spacing during production.
Рекордные значения: Save the скорость и pitch values for quicker and more consistent future setups.
Therefore, this production workflow helps maintain consistent контроль качества and reduces costly scrap material when switching between different продукты.
Maintenance Guide
To keep your toroidal winding and taping machine in top condition, only basic regular maintenance checks are needed. Start by greasing and cleaning all rotating parts and gears at scheduled intervals to ensure smooth motion and reduce wear.
Next, make sure the ventilation paths и cooling fans are clean and unobstructed, as dust buildup can cause overheating and shorten component lifespan. Also, verify proper grounding and confirm that breakers are correctly rated and functioning to ensure stable operation and operator safety.
Overall, just a few minutes of профилактическое обслуживание today can save significant время простоя and repair costs in the future.
Troubleshooting Overview
Here is a simple troubleshooting guide operators can follow when machine issues occur:
Светодиоды не горят. → Check the power connection and main fuse of the machine system.
Двигатель не заводится → Verify the foot pedal function and ensure the speed knob is not set to zero.
Счетчик не регистрирует → Adjust the transducer gap or confirm the correct type (7PA vs 7NA) is selected.
Вращение двигателя вхолостую → Inspect and adjust the drive belt for proper tension and contact.
In most cases, machine issues come from basic власть, датчик, или setup problems—so always check these first before contacting service support.
Лучшие практики
For smoother machine operation and fewer unexpected issues, follow these proven best practices:
Сделайте пробный прогон: Mark the core and run without material to confirm and lock pitch settings before actual winding operation.
Сохраните карточки заданий: Store подача, скорость, and program values under unique recipe names for faster repeat setups.
Регистрируйте ключевые данные: Record tape/wire usage, cycle time, and defect rates to optimize process performance and ramp timing.
Стандартизировать настройки: Prepare reference brake and pressure settings for common core sizes to improve changeover speed and consistency.
In summary, by combining профилактическое обслуживание with smart data logging, you can reduce время простоя машины while extending the service life of your Намоточные машины Гуангри.
Готовы ли вы расширить свое производство катушек?
В Гуангри, we don’t just manufacture machines—we deliver tailored production solutions for your specific manufacturing needs. Whether you’re building your first toroidal taping line or upgrading for higher эффективность производства, our team provides full support, including training, настройка, и послепродажное обслуживание.
Reach out to us today to request operation files, detailed manuals, or a personalized consultation. Let’s make your процесс намотки катушки smarter, faster, and more reliable.
Свяжитесь с нами сейчас и узнайте, почему производители по всему миру доверяют Guangri прецизионные намоточные и лентообмоточные машины.
Часто задаваемые вопросы
Q1: What makes a Guangri toroidal taping machine different?
A1:Guangri toroidal taping machines комбайн ПЛК-управление с Auto и Pedal modes, helping simplify setup while improving winding consistency and production efficiency.
Q2: How can I tell if the machine is ready to run?
A2: Simply check the Ready indicator on the controller. When the light is on, all parameters have been confirmed and the machine is ready to start in Педаль или Автоматический режим.
Q3: Is it easy to switch between Manual and Auto modes?
A3: Yes. Use the front-panel mode switch to change between Руководство и Auto operation. Auto mode starts smoothly, while Manual mode provides direct operator control.
Q4: What if the controller is not counting turns?
A4: In most cases, the sensor setting или transducer gap needs adjustment. Check the selected sensor type and verify the spacing is set correctly.
Q5: How often should the machine be maintained?
A5: Perform regular machine maintenance, including cleaning and lubricating moving parts, checking fans and grounding, and inspecting belts or brakes to help prevent downtime.
В6: Нужно ли программировать контроллер для каждой новой задачи?
A6: Yes, but each coil program can be saved as a unique recipe. This allows faster setup and more efficient repeat production when running similar jobs.