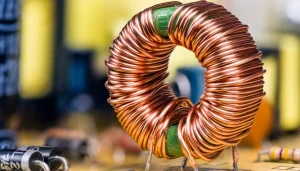
Una macchina toroidale per nastratura/avvolgimento costruisce e rifinisce bobine ad anelloCarica il filo o il nastro isolante in una navetta (o caricatore), ruota il nucleo toroidalee dispone ogni turno con controllo tono, velocità e tensione. Vedrai queste macchine nei negozi di trasformatori, negli assemblaggi di potenza per veicoli elettrici, negli alimentatori audio, nei dispositivi medici e in qualsiasi luogo in cui bassa perdita, basso rumore vengono realizzate parti toroidali.
In addition, when equipped with a taping head, the machine wraps carta/poliestere/kapton tapes evenly around the core. This improves insulation and mechanical strength while ensuring a clean, uniform, and repeatable taping process.
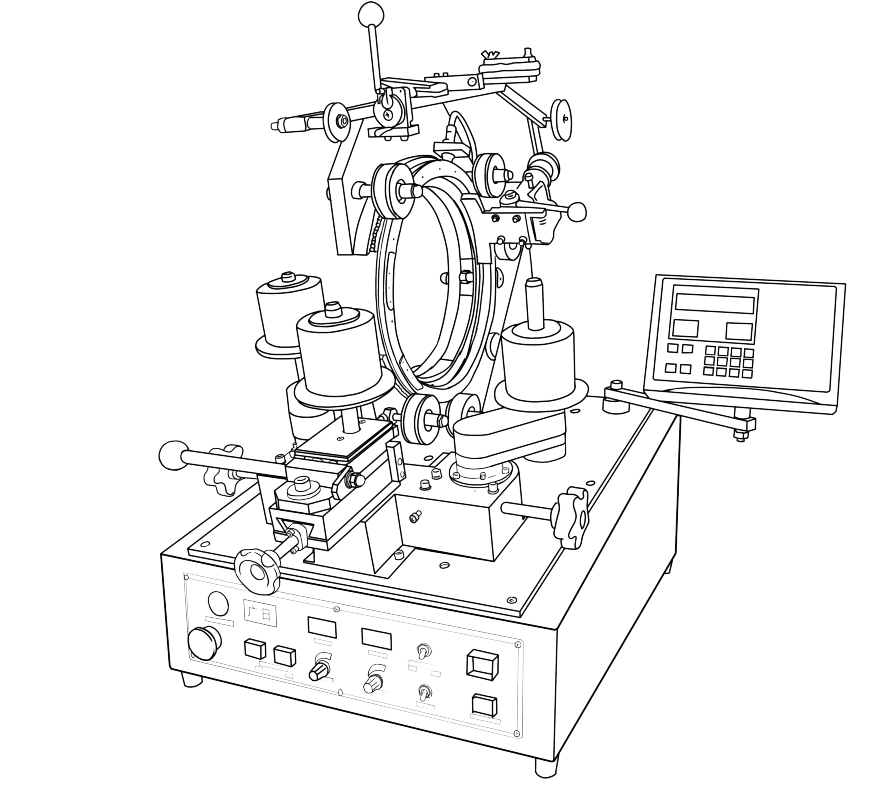
This guide covers Guangri’s PLC-controlled models, compreso il JGC series. With a durable design and a smart PLC controller, operators can save recipes, switch between auto E pedal modes, and achieve consistent production across every shift.
Power & Safety Setup
Before starting any avvolgimento O taping operation, always put sicurezza first. First, install the machine in a clean, well-ventilated area with a temperature of 13–35°C, low vibration, and no corrosive fumes. In addition, ensure proper grounding and use the correct circuit breaker for the Alimentazione elettrica. These simple checks help prevent electrical hazards and protect both the operator and the equipment.
How to Power On Your Macchina avvolgitrice di bobine:
Rilasciare il Arresto di emergenza (E-stop).
Capovolgi il interruttore di alimentazione sulla base.
IL controller will boot into Stato di attesa. IL Indicatore "Pronto/In attesa" lights up when it’s ready. If it’s off, the machine is in Impostazione dello stato, meaning parameters can still be adjusted.
Pro tip: Before loading a core, always double-check the grounding connection and confirm the E-stop reset is properly released. This helps avoid startup faults and ensures a smooth machine start-up process.
Front Panel Controls

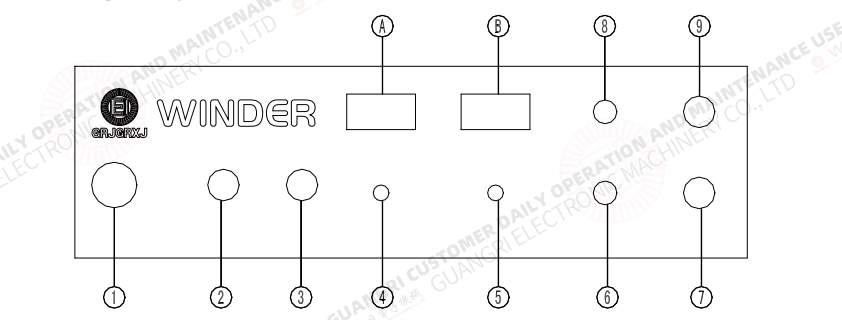
IL Guangri controller front panel is the main control center of the tape machine, handling all key operations:
Nove tasti funzione on the tape machine handle power, start/stop, reset, manual jog, direction control, and auto/manual mode selection.
Two adjustment knobscontrol speed (winding/taping RPM) and pitch (spacing between turns or tape wraps).
IL direction switch controls rotation direction, setting CW (in senso orario) O CCW (in senso antiorario).
IL mode switch toggles between Modalità manuale (slow jog and setup adjustments) and Modalità automatica (avvolgimento/nastratura continua).
Operation Flow of the Avvolgitrice per nastri
Tasto Start/Stop: arms the system and starts the cycle
Tasto di reset: clears errors or gets ready for the next job
Modalità manuale: used for setup, coil positioning, or trial runs
Modalità automatica: enables repeatable, hands-free winding/taping with stored programs.
You can also run via foot pedal mode or switch to full Auto-start (machine ramps up and down automatically).
Rear Panel Switches
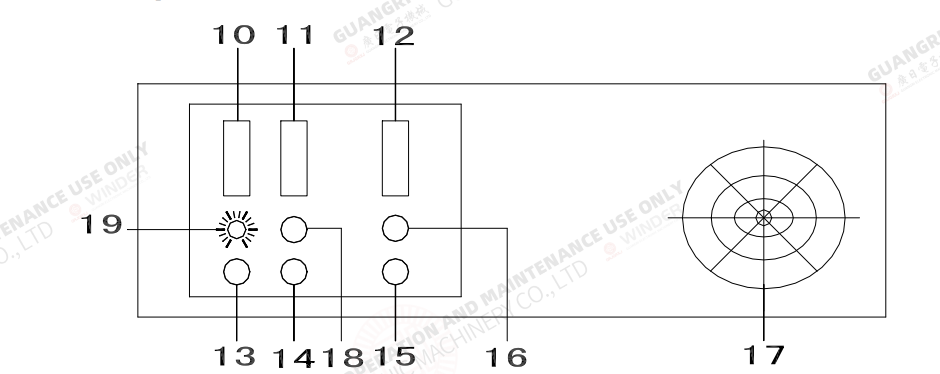
IL base and rear control panels house all connections and deeper configuration settings:
Prese di base connect the controller, foot pedal, sensors, and—on taping machines—the auto-scissors, also including fuse access and main power input.
IL mode selector switch lets you choose Modalità pedale (pedal controls speed/stop) or Avvio automatico (automatic acceleration/deceleration by controller).
IL grounding terminal must always be securely connected before operation.
Sul controller rear panel, you’ll find several machine configuration switches:
Tipo di macchina interruttore: selects toroidal, belt/slider, gear head, or taping models.
Interruttore di rotazione: sets single or double-direction rotation when reversals are required.
Interruttore del trasduttore: matches the correct sensor type(e.g., JG = 7PA, JGC = 7NA). an incorrect setting will prevent the counter from working.
Interruttore di direzione di avvio del nucleo:sets the starting direction for fan-shaped windings in Modalità automatica.
Important: Set all rear-panel switches before the first power-up to ensure the controller recognizes the correct machine configuration.
Controller Programming Overview

Ae t thheart of Guangri’s toroidal taping and winding machines is the pannello di controllo, dove gli operatori impostano e gestiscono ogni lavoro. Il pannello utilizza quattro finestre di visualizzazione chiave:
Finestra delle specifiche – stores job numbers and allows quick saving or recalling of coil specifications.
Finestra del programma – sets the working sequence, such as Load → Wind, with support for additional tap steps.
Finestra temporale – defines how many times each step repeats, reducing the need for repeated programming.
Gira la finestra – sets precise turns for loading, winding, slowdown, and reversal in fan-shaped windings.
The machine operates through three control states:
Impostazione dello stato – where parameters are entered and adjusted.
Stato pronto – once settings are confirmed, the machine is ready to run.
Stato di revisione – meanwhile, stored parameters can be checked before pressing Inizio.
In addition, the Setting, Enter, Return, and Review keys guide operators through parameter input and confirmation, ensuring a smooth, consistent, and reliable workflow.
Auto & Pedal Control Modes
Inoltre, il Guangri machine offers flexible control, allowing smooth switching between pedal operation E Modalità di avvio automatico.
Modalità pedale: The operator controls speed and start/stop using the foot pedal—ideal for setup and manual machine control.
Modalità di avvio automatico:Set via the rear switch on the base, the machine automatically ramps up to preset speed and smoothly slows down at the end without pedal input.
Notably, the collegamento proporzionale between the main drive E rotation drive is a key feature of the Guangri machine. It keeps passo del filo accurate at any velocità di avvolgimento, assicurando consistent spacing E tighter control across different bobine.
Head-Type Setup & Winding
Diverso winding heads need slightly different handling; the Guangri machine supports multiple head designs:
Testa scorrevole – First load the core, then adjust the molla di frizione E cuscinetto di pressione to set proper tensione del filo; ensure the slider moves smoothly without blocking the wire.
Testa della cinghia – Secure the wire end, then fine-tune grip using the vite di tensione della cinghia. Keep the free wire end stable under the core before winding.
Testa dell'ingranaggio – Set the freno to the correct tension before loading. Align the magazine E slider properly, and make sure the wire passes through the scanalatura di guida without slipping.
Testa di nastratura – Route the tape through the pressure clip E electric scissors before feeding it into the magazine. Once running, the machine applies tape automatically and the scissors cut it at the end.
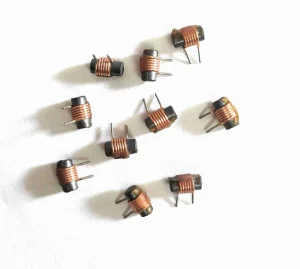
Overall, each head type has its own setup details, but all share the same goal: maintaining stable tension control and ensuring precise winding or taping accuracy
Taping Calculations & Setup
Additionally, understanding a few basic taping calculations helps achieve accurate and repeatable results. The key formulas are:
giri di nastro = circonferenza del nucleo ÷ (larghezza del nastro – sovrapposizione)
Giri di carico = giri del nastro × (lunghezza di un giro ÷ circonferenza del caricatore)
These calculations ensure proper tape overlap, helping maintain consistent spessore dell'isolamento and full coverage on every layer.
Esempio di configurazione:
Misurare il core outer diameter to determine the circumference
Select the tape width and desired overlap (e.g., 2 mm).
Calculate the required tape-turns using the formula.
Enter the load-turns value into the controller.
Esegui un dry test cycle to verify settings before production.
By following these steps, you can reduce trial-and-error while maintaining consistent taping quality and material efficiency.
Essential Switch Setup
Most importantly, before the first power-up, make sure all front and rear panel switches are set correctly. Missing this step may lead to counting errors, incorrect settings, or machine startup issues.
Modalità: select Auto O Pedale operation based on your workflow.
Tipo di macchina: choose the correct avvolgimento, taping, or head configuration.
Rotazione: set CW (in senso orario) O CCW (in senso antiorario) direzione.
Tipo di sensore: match 7PA O 7NA to the machine model, as an incorrect setting will prevent the counter from registering.
As a result, these basic settings help the controller recognize the correct hardware configuration and ensure accurate winding or taping operation according to the programmed settings.
Operating Workflow
Ogni winding or taping job follows a clear and structured process to ensure accurate and consistent results:
Impostazione del carico: Open the shuttle O magazine and secure the core in place.
Regolazione del rullo: Set the polyurethane rollers for proper grip and smooth operation.
Filettatura: Route the wire or tape through the guides, pads, and tensioners correctly.
Avviare il processo: Premere Inizio to begin. In Modalità automatica, the machine reaches the preset speed automatically; in Modalità pedale, speed and movement are controlled manually.
Monitor: Adjust the velocità E pitch knobs as needed to fine-tune spacing during production.
Valori record: Save the velocità E pitch values for quicker and more consistent future setups.
Therefore, this production workflow helps maintain consistent controllo di qualità and reduces costly scrap material when switching between different prodotti.
Maintenance Guide
To keep your toroidal winding and taping machine in top condition, only basic regular maintenance checks are needed. Start by greasing and cleaning all rotating parts and gears at scheduled intervals to ensure smooth motion and reduce wear.
Next, make sure the ventilation paths E cooling fans are clean and unobstructed, as dust buildup can cause overheating and shorten component lifespan. Also, verify proper grounding and confirm that breakers are correctly rated and functioning to ensure stable operation and operator safety.
Overall, just a few minutes of manutenzione preventiva today can save significant tempo di inattività and repair costs in the future.
Troubleshooting Overview
Here is a simple troubleshooting guide operators can follow when machine issues occur:
Nessun LED acceso → Check the power connection and main fuse of the machine system.
Il motore non si avvia → Verify the foot pedal function and ensure the speed knob is not set to zero.
Il contatore non si registra → Adjust the transducer gap or confirm the correct type (7PA vs 7NA) is selected.
Motore di rotazione inattivo → Inspect and adjust the drive belt for proper tension and contact.
In most cases, machine issues come from basic energia, sensore, O setup problems—so always check these first before contacting service support.
Migliori pratiche
For smoother machine operation and fewer unexpected issues, follow these proven best practices:
Fai una prova generale: Mark the core and run without material to confirm and lock pitch settings before actual winding operation.
Salva le schede di lavoro: Store pece, velocità, and program values under unique recipe names for faster repeat setups.
Registra i dati chiave: Record tape/wire usage, cycle time, and defect rates to optimize process performance and ramp timing.
Standardizzare le configurazioni: Prepare reference brake and pressure settings for common core sizes to improve changeover speed and consistency.
In summary, by combining manutenzione preventiva with smart data logging, you can reduce tempo di inattività della macchina while extending the service life of your Bobinatori Guangri.
Pronti a portare la vostra produzione di bobine a un livello superiore?
A Guangri, we don’t just manufacture machines—we deliver tailored production solutions for your specific manufacturing needs. Whether you’re building your first toroidal taping line or upgrading for higher efficienza produttiva, our team provides full support, including training, personalizzazione, E servizio post-vendita.
Reach out to us today to request operation files, detailed manuals, or a personalized consultation. Let’s make your processo di avvolgimento della bobina smarter, faster, and more reliable.
Contattaci ora e scopri perché i produttori di tutto il mondo si affidano a Guangri per le macchine avvolgitrici e nastratrici di precisione.
Domande frequenti
Q1: What makes a Guangri toroidal taping machine different?
A1:Guangri toroidal taping machines combinare Controllo PLC con Auto E Pedal modes, helping simplify setup while improving winding consistency and production efficiency.
Q2: How can I tell if the machine is ready to run?
A2: Simply check the Ready indicator on the controller. When the light is on, all parameters have been confirmed and the machine is ready to start in Pedale O Modalità automatica.
Q3: Is it easy to switch between Manual and Auto modes?
A3: Yes. Use the front-panel mode switch to change between Manuale E Auto operation. Auto mode starts smoothly, while Manual mode provides direct operator control.
Q4: What if the controller is not counting turns?
A4: In most cases, the sensor setting O transducer gap needs adjustment. Check the selected sensor type and verify the spacing is set correctly.
Q5: How often should the machine be maintained?
A5: Perform regular machine maintenance, including cleaning and lubricating moving parts, checking fans and grounding, and inspecting belts or brakes to help prevent downtime.
D6: Devo programmare il controller per ogni nuovo lavoro?
A6: Yes, but each coil program can be saved as a unique recipe. This allows faster setup and more efficient repeat production when running similar jobs.